Writing your own class
Sometimes the best option to customize a document is to write a new class from scratch. This article explains the main structure and commands needed in a new class.
Introduction
The first thing to do before coding a new class is to determine whether you really need a new class or not. It's recommended to search on CTAN (Comprehensive TeX Archive Network) and see if someone already created something similar to the document class you need.
Another important thing to have in mind is the difference between packages and classes. Making the wrong choice can affect the flexibility of the final product.
General structure
The structure of all class files can be roughly described in the next four parts:
- Identification. The file declares itself as a class written with the LaTeX2ε syntax.
- Preliminary declarations. Here the external packages and classes needed are imported. Also, in this part of the file the commands and definitions needed by the declared options are coded.
- Options. The class declares and processes the options.
- More declarations. The main body of the class. Almost everything a class does is defined here.
In the next subsections a more detailed description of the structure and a working example, exampleclass.cls, will be presented.
Identification
There are two simple commands that all classes must have:
\NeedsTeXFormat{LaTeX2e}
\ProvidesClass{exampleclass}[2014/08/16 Example LaTeX class]
The command \NeedsTeXFormat{LaTeX2e} sets the LaTeX version for the class to work. Additionally, a date can be added within brackets to specify the minimal release date required.
The command ProvidesClass{exampleclass}[...] identifies this class as exampleclass and, inside the brackets, the release date and some additional information is included. The date should be in the form YYYY/MM/DD
Open an example of how to write a class in Overleaf
Preliminary declarations
Most of the classes extend and customize existing ones, and also need some external packages to work. Below, some more code is added to the sample class exampleclass.cls.
\NeedsTeXFormat{LaTeX2e}
\ProvidesClass{exampleclass}[2014/08/16 Example LaTeX class]

\newcommand{\headlinecolor}{\normalcolor}
\LoadClass[twocolumn]{article}
\RequirePackage{xcolor}
\definecolor{slcolor}{HTML}{882B21}
The commands in this part either initialize some parameters that latter will be used to manage the options, or import external files.
The command \LoadClass[twocolumn]{article} loads the class article with the additional parameter twocolumn. Therefore all the commands in the standard article class will be automatically available in the example class, except that the document will be printed in a two-column format.
\RequirePackage is very similar to the well-known \usepackage, adding optional parameters within brackets will also work. The only difference is that the \usepackage can not be used before \documentclass command. It's strongly recommended to use \RequirePackage when writing new classes or packages.
Open an example of how to write a class in Overleaf
Options
To allow some flexibility in the classes a few additional options are very useful. The next part in the file exampleclass.cls handles the parameters passed to the document class command. We've also moved \LoadClass to after the options are processed, so that options set in the .tex file can be passed to the base class.
\NeedsTeXFormat{LaTeX2e}
\ProvidesClass{exampleclass}[2014/08/16 Example LaTeX class]

\newcommand{\headlinecolor}{\normalcolor}
\RequirePackage{xcolor}
\definecolor{slcolor}{HTML}{882B21}

\DeclareOption{onecolumn}{\OptionNotUsed}
\DeclareOption{green}{\renewcommand{\headlinecolor}{\color{green}}}
\DeclareOption{red}{\renewcommand{\headlinecolor}{\color{slcolor}}}
\DeclareOption*{\PassOptionsToClass{\CurrentOption}{article}}
\ProcessOptions\relax
\LoadClass[twocolumn]{article}
There are four main commands here that handle the options passed to the class.
The command \DeclareOption{}{} handles a given option. It takes two parameters, the first one is the name of the option and the second one is the code to execute if the option is passed.
The command \OptionNotUsed will print a message in the compiler and the logs, the option won't be used. In this case the document is set to two-column and if the user tries to change it to one column that won't work, the option will be ignored.
The command \Declareoption*{} handles every option not explicitly defined. It takes only one parameter, the code to execute when an unknown option is passed. In this case it will run the next command:
\PassOptionsToClass{}{}. Passes the option inside the first pair of braces to the document class set inside the second pair of braces. In the example, all unknown options will be passed to the article document class.
\CurrentOption stores the name of the class option being handled at a determined moment.
The command \ProcessOptions\relax executes the code for each option and must be inserted after all the option-handling commands were typed. There's a starred version of this command that will execute the options in the exact order specified by the calling commands.
In the example, if the options red or green are passed to the document the font used for the headline and the sections will be set to the corresponding colour. The colour called slcolor was defined in the preliminary declarations after importing the xcolor package.
Open an example of how to write a class in Overleaf
More declarations
In this part most of the commands will appear. In "exampleclass.cls" the dimensions of the page, the font size for the title, the body and the sections are set. Below you can see the full class file.
\NeedsTeXFormat{LaTeX2e}
\ProvidesClass{exampleclass}[2014/08/16 Example LaTeX class]

\newcommand{\headlinecolor}{\normalcolor}
\RequirePackage{xcolor}
\definecolor{slcolor}{HTML}{882B21}

\DeclareOption{onecolumn}{\OptionNotUsed}
\DeclareOption{green}{\renewcommand{\headlinecolor}{\color{green}}}
\DeclareOption{red}{\renewcommand{\headlinecolor}{\color{slcolor}}}
\DeclareOption*{\PassOptionsToClass{\CurrentOption}{article}}
\ProcessOptions\relax
\LoadClass[twocolumn]{article}

\renewcommand{\maketitle}{%
    \twocolumn[%
        \fontsize{50}{60}\fontfamily{phv}\fontseries{b}%
        \fontshape{sl}\selectfont\headlinecolor
        \@title
        \medskip
        ]%
}

\renewcommand{\section}{%
    \@startsection
    {section}{1}{0pt}{-1.5ex plus -1ex minus -.2ex}%
    {1ex plus .2ex}{\large\sffamily\slshape\headlinecolor}%
}

\renewcommand{\normalsize}{\fontsize{9}{10}\selectfont}
\setlength{\textwidth}{17.5cm}
\setlength{\textheight}{22cm}
\setcounter{secnumdepth}{0}
To understand the rest of the commands see the reference guide and the links in the further reading section.
The last four commands in the example show the four things that all classes must contain:
- The definition of
normalsize. Sets the default font size. - A default value for
textwidth - A default value for
textheight - The specifications for the page numbering.
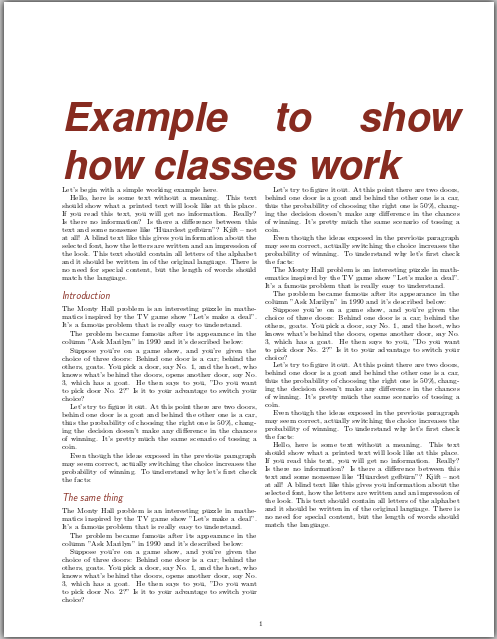
Below, a document that uses the class exampleclass.cls.
\documentclass[red]{exampleclass}
\usepackage[utf8]{inputenc}
\usepackage[english]{babel}

\usepackage{blindtext}

\title{Example to show how classes work}
\author{Team Learn ShareLaTeX}
\date{August 2014}

\begin{document}

\maketitle

\noindent
Let's begin with a simple working example here.

\blindtext

\section{Introduction}

The Monty Hall problem...

\section{The same thing}

The Monty...
Notice that the first command here is
\documentclass[red]{exampleclass}
Open an example of how to write a class in Overleaf
Handling errors
When it comes to develop new classes it's important to handle possible errors to let know the user that something went wrong. There are four main commands to report errors in the compiler.
\ClassError{class-name}{error-text}{help-text}. Takes three parameters, each one inside braces: the class name, the error text which is going to be displayed (the compilation process will be paused), and the help text that will be printed if the user press "h" when the compilation pauses because of the error.\ClassWarning{class-name}{warning-text}. In this case the text is displayed but the compilation process won't stop. It will show the line number where the warning occurred.\ClassWarningNoLine{class-name}{warning-text}. Works just like the previous command, but it won't show the line where the warning occurred.\ClassInfo{class name}{info-text}. In this case the information in the second parameter will only be printed in the transcript file, including the line number.
Open an example of how to write a class in Overleaf
Reference guide
List of commands commonly used in classes and packages
\newcommand{name}{definition}. Defines a new command, the first parameter is the name of the new command, the second parameter is what the command will do.\renewcommand{}{}. The same as\newcommandbut will overite an existing command.\providecommand{}{}. Works just as\newcommandbut if the command is already defined this one will be silently ignored.\CheckCommand{}{}. The syntax is the same as\newcommand, but instead it will check whether the command exists and has the expected definition, LaTeX will show a warning if the command is not what\CheckCommandexpected.\setlength{}{}. Sets the length of the element passed as first parameter to the value written as second parameter.\mbox{}. Creates a box that contains the elements written inside the braces.\fbox{}. The same as\mbox, but a box is actually printed around the contents.
Further reading
For more information see
- Understanding packages and class files
- Writing your own package
- Commands and Environments
- Lengths in LaTeX
- Using colours in LaTeX
- Management in a large project
- LaTeX2ε for class and package writers
- Notes on programming in tex
- Minutes in less than hours: Using LaTeX Resources
- The LaTeX Companion. Second edition